Internet Radio Receiver

Internet Radio Receiver

2008/10/28

IRF: The Integrated Digital Service Center

You can link your personal website by the media center of product “Emprex Internet Radio” directly. Other users can link into your website by product’s media center as well, and no need to link through the “Add New Radio Station”.

Please follow the below steps to set-up:

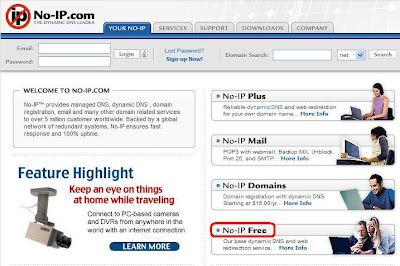
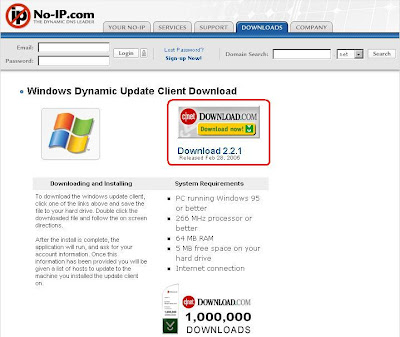
1. Please link the website http://www.emprex.com/iradio/, and click "Join Us" to create your new account.
And then click "Register Now"

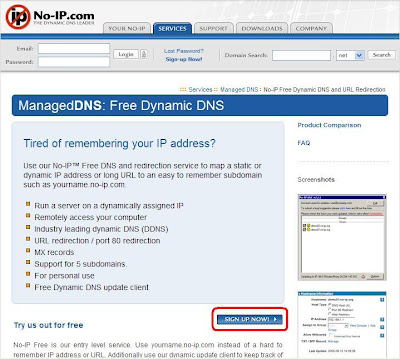
To choose "Accept" and spot it, wait 30 seconds to click "Continue" to next page.
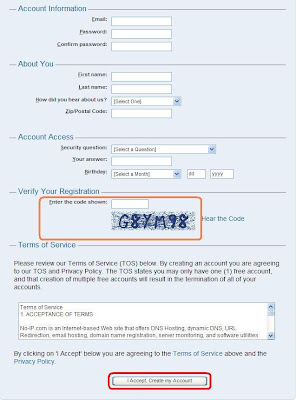
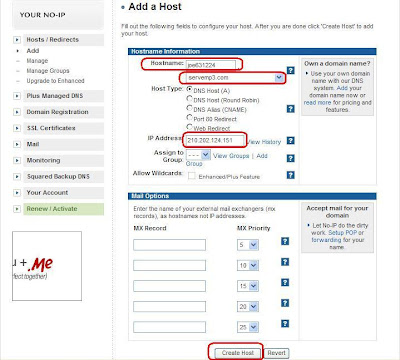
Check the column with "" sign and fill your information inside.
Make sure to fill the correct information and click "Submit" to send out.

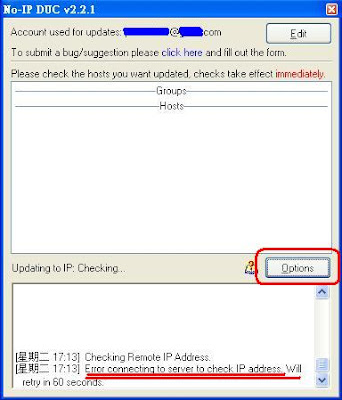
If your information is incorrect, you will see the error message as like the following photo.

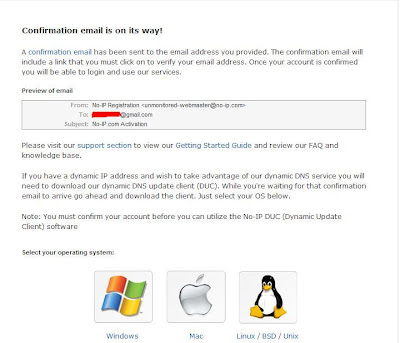
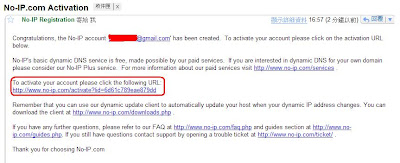
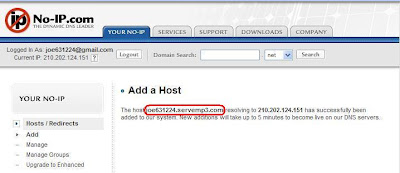
If your inputs are correct, then it will send message to your mail address.

Once you received the confirmation letter at your set-up email address, please click the hyperlink to enable your account immediately.


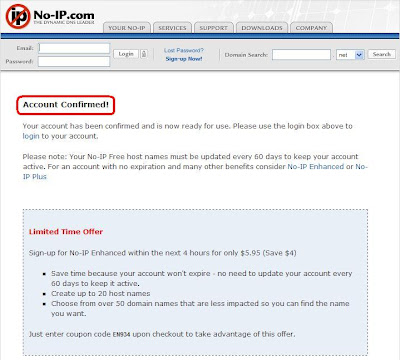
When you use the hyperlink into our welcome page, your have already set-up your own account successfully.
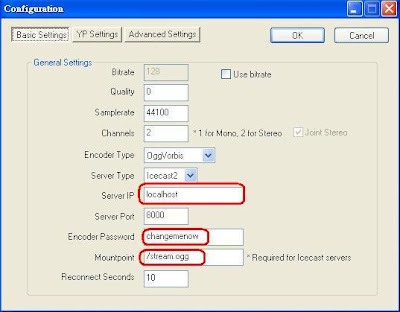
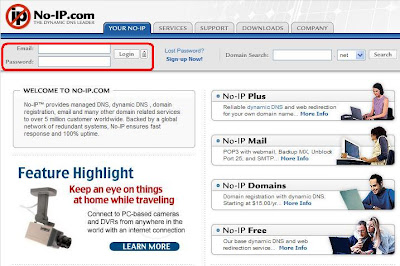
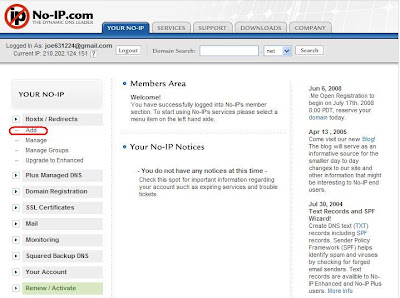
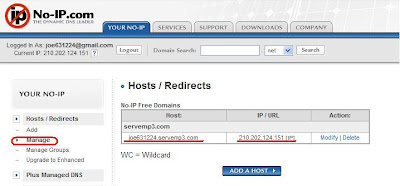
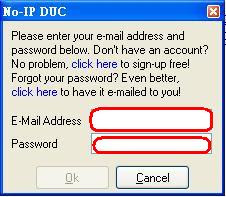
Login your passwords from the upper squares.

Enter into "My Radio Station" and click "New One" to add a new connection.

Filling up your information and press "Save".

If the URL is same as other user, you will see the error message.

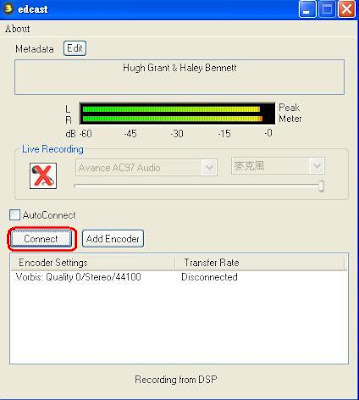
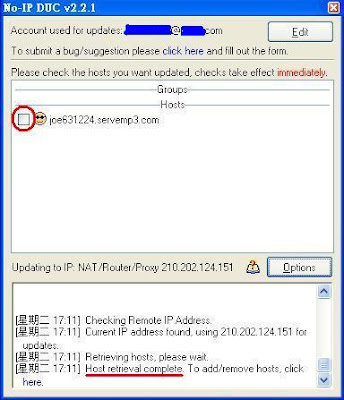
If it is okay, then you will see the photo as below.

2008/09/22

IRF wireless network settings

IRF is not only apply to Ethernet, it also can be used for the WiFi. Thus you can enjoy the convenience of the wireless anytime.Study the following diagrams and you can easy operate our IRF step by step.

PS. In the wireless network hypothesis, IRF does not support the wireless router the hideaway type SSID connection and needs to penetrate the homepage to be authorized the authentication by way of the user the WiFi network.

Power on - The “EMPREEX” symbol will shown on the monitor after few second, please wait for it patiently

Moves the option to the “Configuration” and click it.

Enter in to the option "Configuration" and click the option “Network”.

Network has two networks options, chooses the “WiFi Configuration”.

Click “WiFi Configuration” then will search the available network points automatically.
After click will search around to find the point of use Network.If the network of choice at this icon, you need to use WEP/WAP key to open.

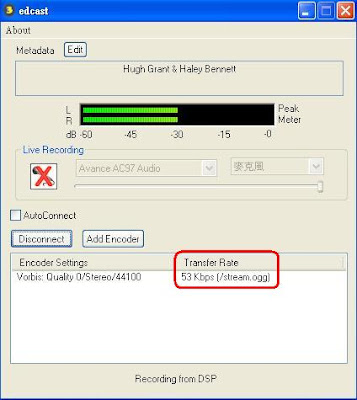
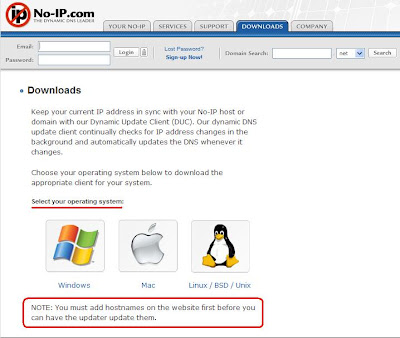
If icon did not appear, click “Direct Connection” to connect directly.

If you need WEP/WPA key, then click “Enter WEP/WPA”.

After set WEP/WPA key, press Enter.

Started to connect action.

When the following picture network icon in the WiFi connection is successful.

If the network icon in the following picture is the failure of the wireless network connection, make sure that the key network settings are correct or network connection is normal.


2008/09/03

Create a personal Web radio

You can stream your music collection to the Internet from your PC, you also need a source program like foobar to give audio to your Icecast server. Please download three software with following URLs and then execute installation of these programs with default options.

Downloads:
Ø Foobar - Audio player for Windows platform
http://www.foobar2000.org/ current version: foobar2000 version 0.9.5.5

Ø Icecast - Icecast is a free software program for streaming multimedia as server, the Icecast server is capable of streaming media content.
http://www.icecast.org/ current version: icecast2_win32_2.3.2_setup.exe

Ø eddcast - Eddcast is an audio encoder that can be used to create Internet streams of varying types such as mp3, ogg vorbis, etc. It’s a plug-in tool for Foobar2000 as well as a standalone encoder.
http://www.oddsock.org/ current version: edcast_foobar_3.1.18.exe


I. Icecast Configuration

Run Icecast2 Win32.exe. Click “Configuration -> Edit Configuration


The icecast.xml window pops up. Find out the source-password (ref. below screenshot,) and enter the unique password here for all source stream (default value: hackme), save your new password and close the window.

Note: The used by the local icecast2 server and by other icecast2 servers pulling audio data off the local machine. Both local and remote machines must match relay passwords in order for relaying to work. Choose something not easily guessed by others or else you may find other icecast2 servers out there serving up your audio data.


The red icon “Stopped” pointed to Icecast server is stopped as show on below screenshot; click “Start Server” to activate Icecast server.


The green icon “Running” pointed to Icecast server is activating successfully as show on below screenshot.


II. Foobar Configuration

Run foobar2000, click “File -> Preferences” for configuration.


Click the tool bar on the left. Select item “Playback ->DSP Manager” find out decoder “ edcast V3”in Available DSPs block on right screen, select item “edcast V3”, click [<=] button to move edcast V3 to Active DSPs block.


Edcast has been moved to Active DSPs block, click “Save All” and close the preference window.


III. Edcast Configuration

Add the song you want to play on foobar2000. Select “File -> Add Files/Folder/Location” and click Play button. An edcast window will pop up.


Click “Add Encoder” and move cursor to the new encoder. Press right button and click “Configure” the configuration window pops up.


Server IP:
The IP address of the Icecast server, enter localhost (127.0.0.1) for you install foobar and Icecast on the same PC (the default server IP shows “localhost”), otherwise you need to enter IP address of PC Icecast server installed.

Encoder Password:
The password needed by the Icecast streaming server to accept your stream, enter the unique password for Icecast (default password: “hackme”, or follow the new password icecast.xml you saved). Please note that both encoder password of oddcast and source password in Icecast’s configuration must match passwords in order for making connection.

Mountpoint:
Icecast streaming always has a producing "/" and a concluding ".ogg". For example, this field should be as follows: /radiofree.ogg, so you can enter broadcast name you preferred for connecting (default value: “/stream.ogg”)

After complete configurations, click “OK” on right-top to exit configuration windows.
Select encoder and click “Connect”, you will see “***Kbps” showing which means streaming audio to Icecast server completed successfully.


Now, you may add the stations of Icecast server into IRP/IRF/IRZ or add URL into Foobar2000 or Winamp.

Your broadcasting URL: http://your-ip:8000/stream.ogg
(Stream.ogg is the default value)
If you have NO-IP’s hostname, your broadcasting URL: http://your-name.no-ip.com:8000/stream.ogg

Click the black block to turn on Peak Meter

Microphone:

Click the microphone icon to activate the function. Due to microphone function and music play back function could not work at the same time, you are not able to hear music play back when microphone is on. You could enable either microphone or music play back at the same time.


2008/08/29

Others can apply for the "Free Dynamic DNS" website

Except NO-IP, provides several in this all to support applies for"Free Dynamic DNS" the website for everybody reference choice.


1. DynDNS

http://www.dyndns.com/


2. FreeDNS

http://freedns.afraid.org/


3. DNSexit

http://www.dnsexit.com/


4. Microtech Limited

http://www.mtgsy.net/default.php


Many of the Internet apply for the "Free Dynamic DNS", in which only four for reference.


2008/08/25

Make your dynamic IP correspond to a fix web name

No-IP DUC is a free program for updating your dynamic DNS, general time-restricted users use dynamic IP. Dynamic IP is unable to build Web server, FTP server, Email and Game server since other people could not get your IP Address. No-IP DUC could update and correspond to fix IP Address, other people may connect to your host. Also you can build your personal Web server, FTP server, Email and Game server.


Here introduces how to register free web name and setup

Register a NO-IP Free

Please access the website http://www.no-ip.com/.


Click “ No-IP Free ” to register a free web name.


Click “ SIGN UP NOW ” and start registration.


Fill in the information and enter the code displayed in the figure. Click I Accept. Create my Account ” to deliver your application.

Registration is successful. NO-IP will send you an e-mail to start your account.


Click the website in NO-IP Registration email to start the account.


Account confirmed, the registration is done.


Fill in the Email and password and click “ Login ” .


After login, click the tool bar on the left. Select “ Hosts/Redirect -> Add to register a host.


Enter preferred hostname and select the Webspace. Confirm the IP Address and click “ Create Host ”.


New host has successfully added. Memorize your host name.


Click the tool bar on the left. Select “ Hosts/Redirect -> Manage ” .Check if the host corresponds to the dynamic IP Address. Your personal host has added successfully.

Download Dynamic Update Client tool

Dynamic DNS update client continually checks for IP address changes in the background and automatically updates the DNS whenever it changes.You can in DOWNLOADS page select your operating system.


In Windows system, can download ducsetip.exe and installs it completes.


After the download is complete the implementation of programs, appear as shown below, click the next until the finish.


Please enter your e-mail address and password below.


If has because the firewall function to block the port 8245 connection may be wrong, then click on "Option"


Check the Use alternate port functions, and then the end of Ok.


The connection is successful and there NO-IP set by the host name and check up.


Under the plan is a smiling face is set to complete.